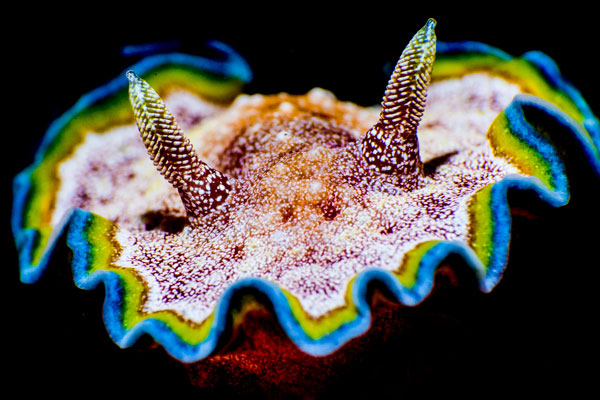
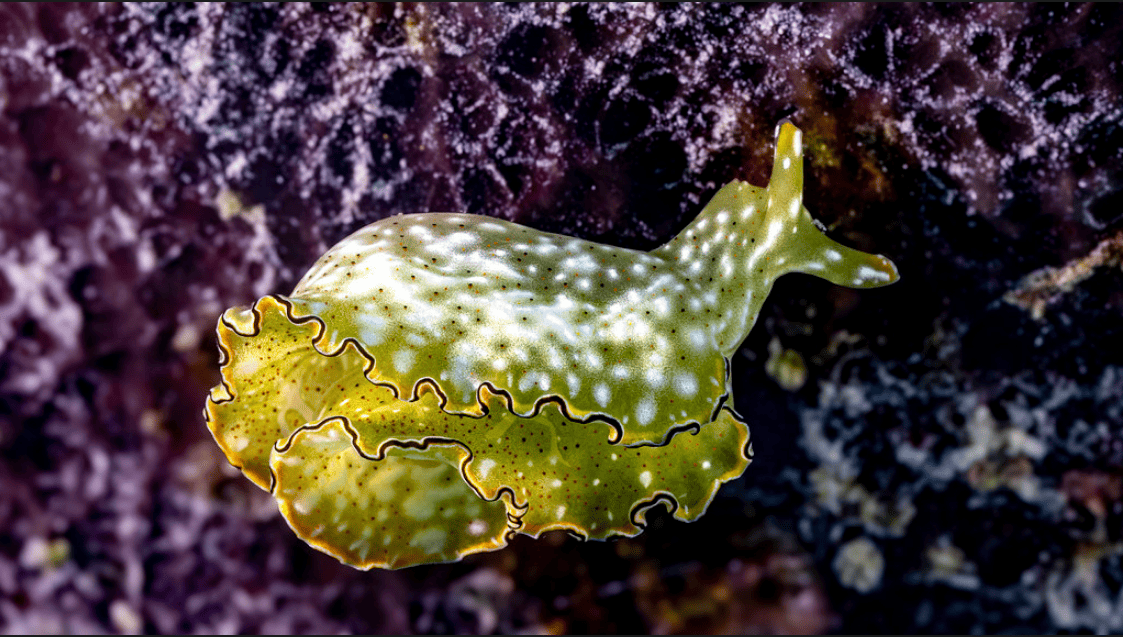
Main photo, Halgerda batangas by Gerhard Batz
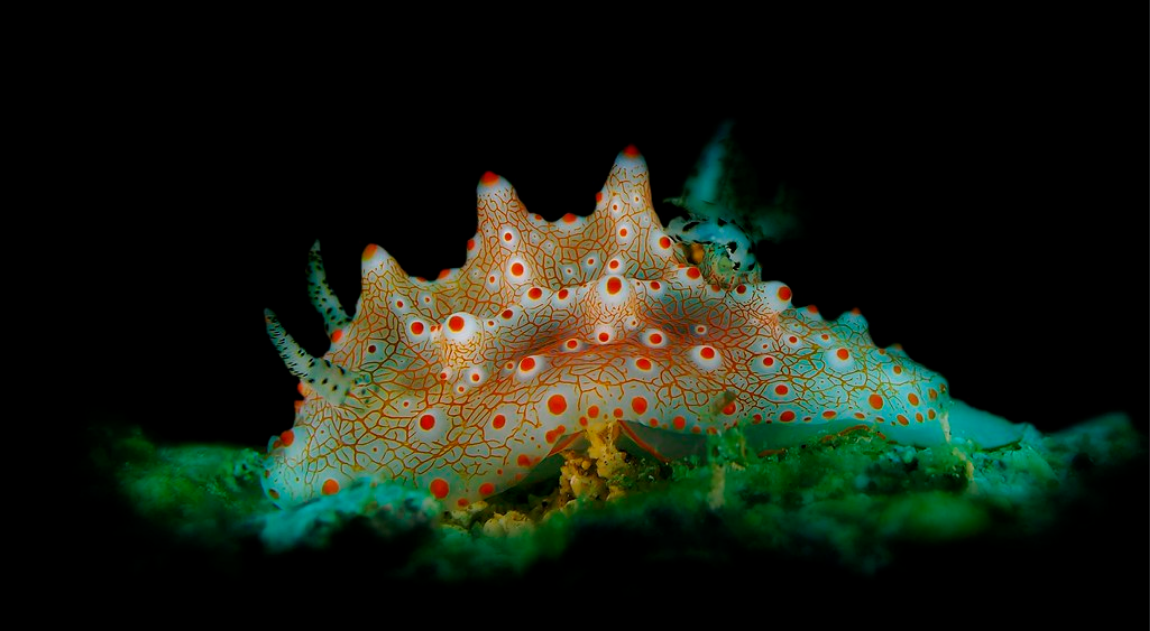
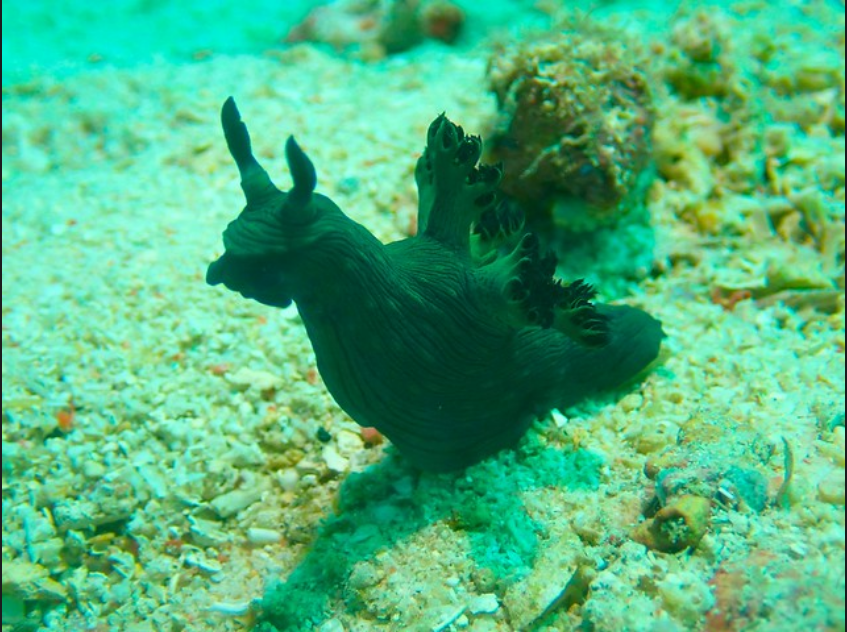
Firstly, the vast majority of photos are taken at depth so it’s probably a good idea to be able to scuba dive…and also most nudibranchs tend to look like this without the use of special lighting set ups

Above, by McChuckerson
Above by Go Zilla
(Please note, I’m not criticizing or taking the piss out of these photos or the photographers, I just want to show how nudis look under normal lighting)
A lot of nudi photos have black backgrounds which are created by using a strobe lighting set up configured like this…
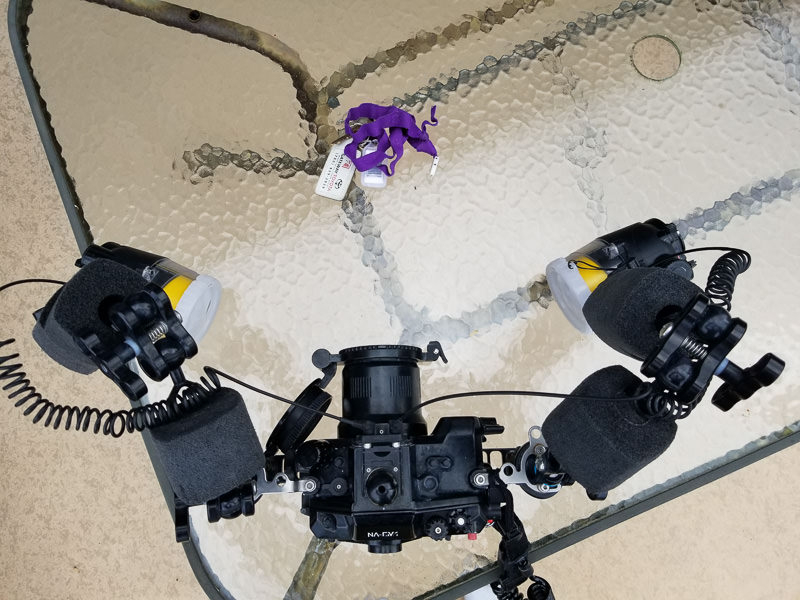
Above, ‘This is how… (Bryan Chus) setup looks to get a successful test shot on land, using my 60mm macro lens (120 mm full frame equivalent).’
Above, ‘Non-lit test subject using black background settings (1/320 sec, f/14, ISO 100).’

Above, ‘Properly lit test subject with inward facing strobes.’
The photos give results like these…
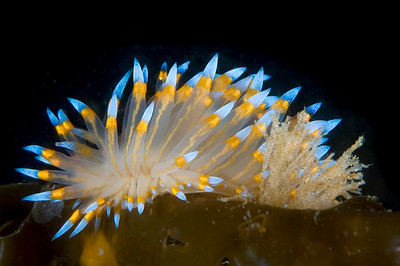
Above, Janolus nudibranch
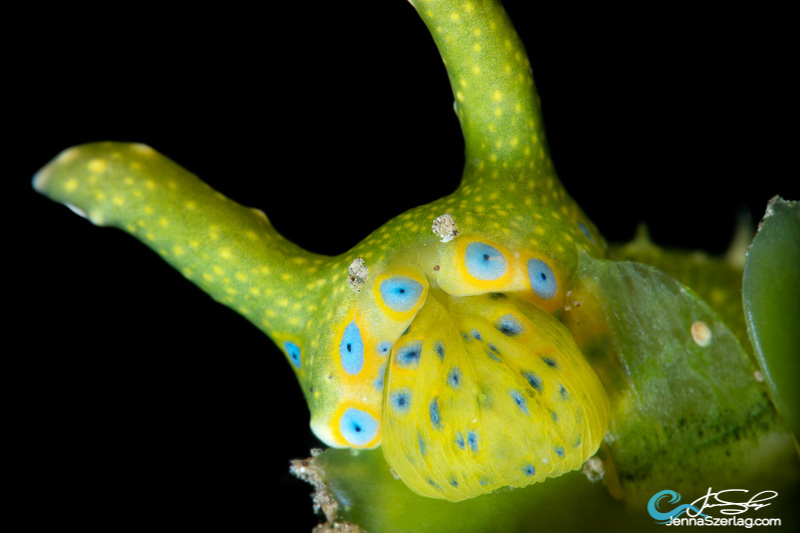
Above, ‘Oxynoe jordani feeds on Caulerpa taxilfolia Canon 5DSr 100mm Lens ISO100 1/250 f/25’ by Jenna Szerlag
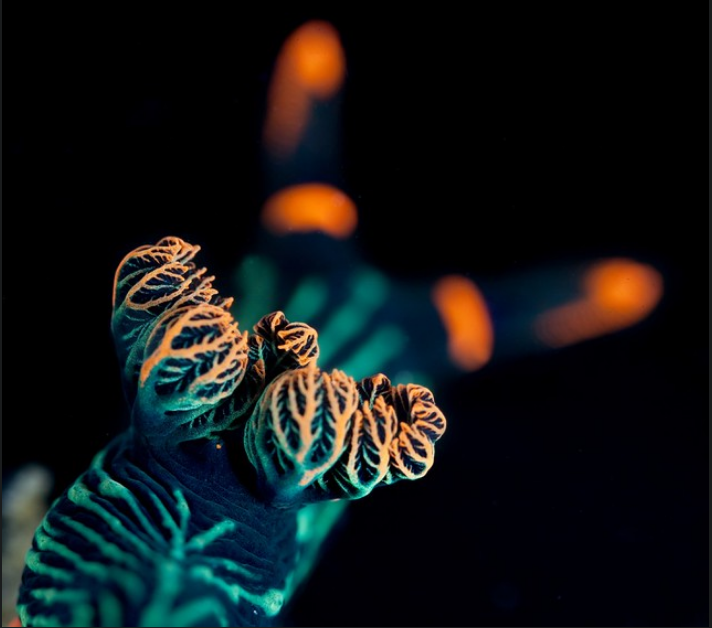
Above by Andrey torchuck
Of course there’s slightly more to getting an amazing photograph than just having the right set up…
Composition, highlighting natural features, symmetry, depth of field, background contrast, animal behaviour all play their role
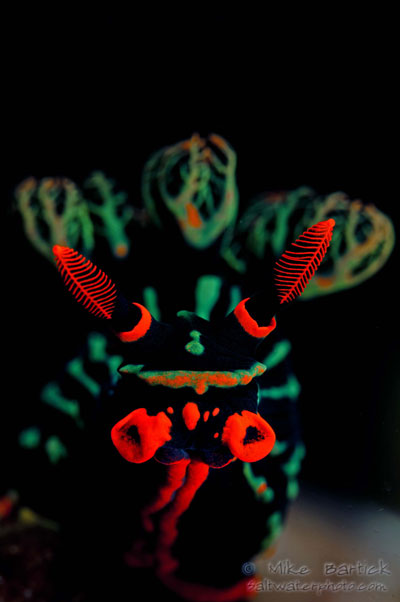
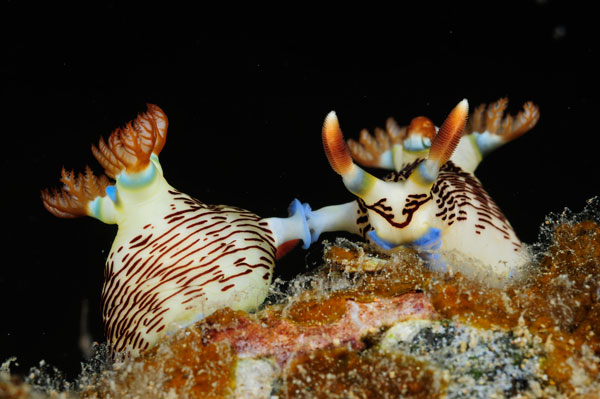
Above, ‘Showing nudibranch symmetry works well, like with this shot of a Nebrotha kuberyani. [Mike Bartick] particularly like[s] to shoot these guys because of their interesting facial features, texture and vibrant colors.’
Above, ‘Chromodoris leopardis. Laying eggs is always a very interesting behavior to capture. The eggs are often brightly colored and textured. If eggs are found alone, inspect them, as other nudibranchs often feed on them.’
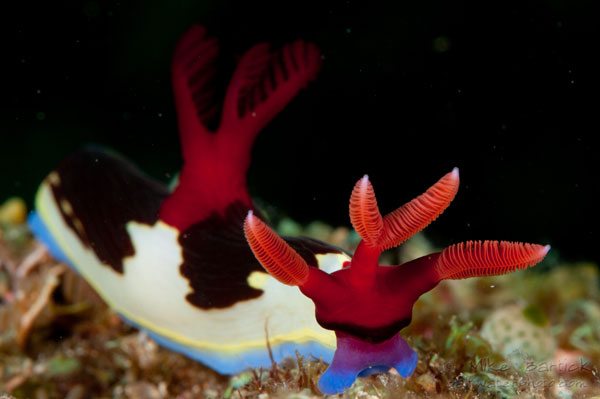
Above, ‘Nembrotha chamberlaini. If there is an anomaly of some sorts that sets your subject apart for the norm be sure that this anomaly is the center of the viewers’ attention.’
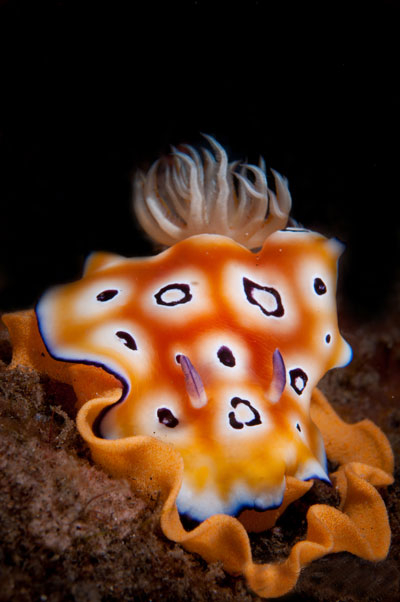
Above, ‘Extreme depth of field isn’t always necessary, but on a larger subject its hard to resist, especially when one is as colorful as this Hypseledoris. Backing away from your subject is an easy way to slightly increase your DOF when working with nudibranchs.’
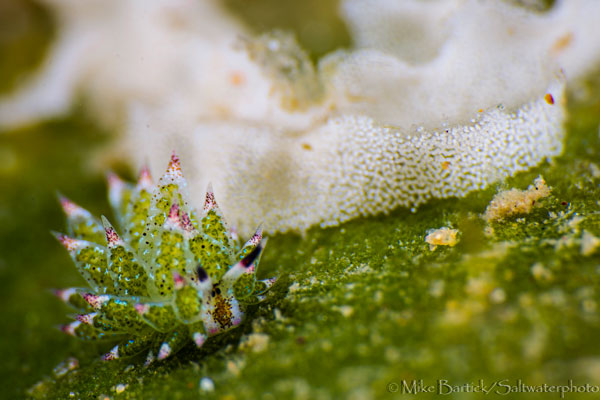
Above, ‘Using a quality diopter of +10 or greater will dramatically increase the size of very small subjects and allow you to fill the frame with very little cropping. These Castosiella kuroshimae are miniscule and nearly impossible to detect. Look on small algae on sandy dive sites.’
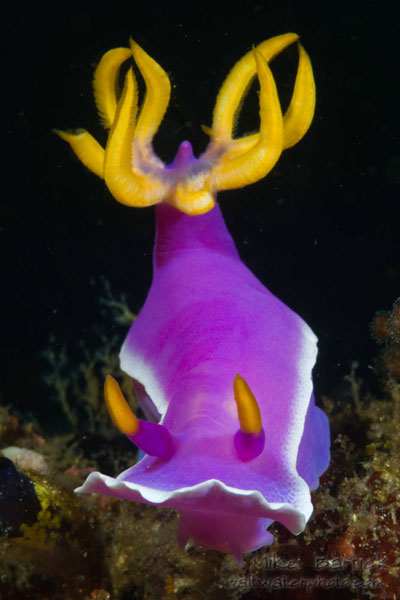
Above, ‘Nembrotha lineota. Get low, get close and shoot up. Use negative space and be sure your subject’s Rhinophores are sharp.’
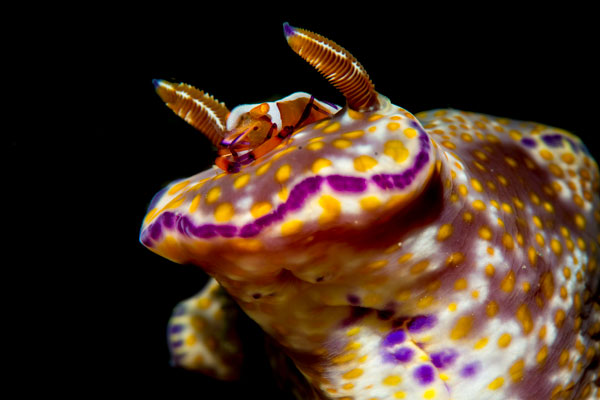
Above, ‘Miamira tenue aka Ceratasoma tenue can grow to impressive sizes. Some are large enough to sport accessories like this emperor shrimp that lives a symbiotic lifestyle with its host. Keeping its hosts gills cleaned and rummaging for food as the nudi moves along the substrate is priority number 1 for the shrimp, and getting photos of them on the nudi are great behavioral images.’
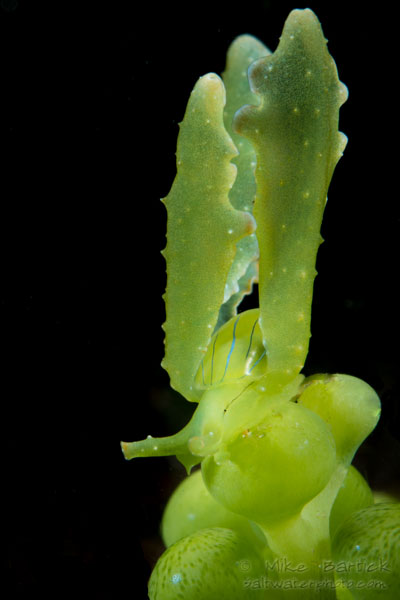
Above, ‘Mimicry is another behavior that an entire article could be written about, especially with these amazing Lobiger sp. Sap suckers live on algae that resembles green grapes. This image was shot in very shallow water in broad daylight. Using a high shutter speed will enable you to control the incoming light, even on the sunniest days. When a subject is tall, try turning your camera to the portrait position.’
Above, ‘Glossodoris cincta. These larger nudis will fill your frame easily with or without a diopter. Paying close attention to the camber of your subject’s Rhinophores will help with head-on composition. The gills of the cincta actually vibrate as they move and are fun to watch.’
Not all photographers use black backgrounds for their photos and the results are just as beautiful…
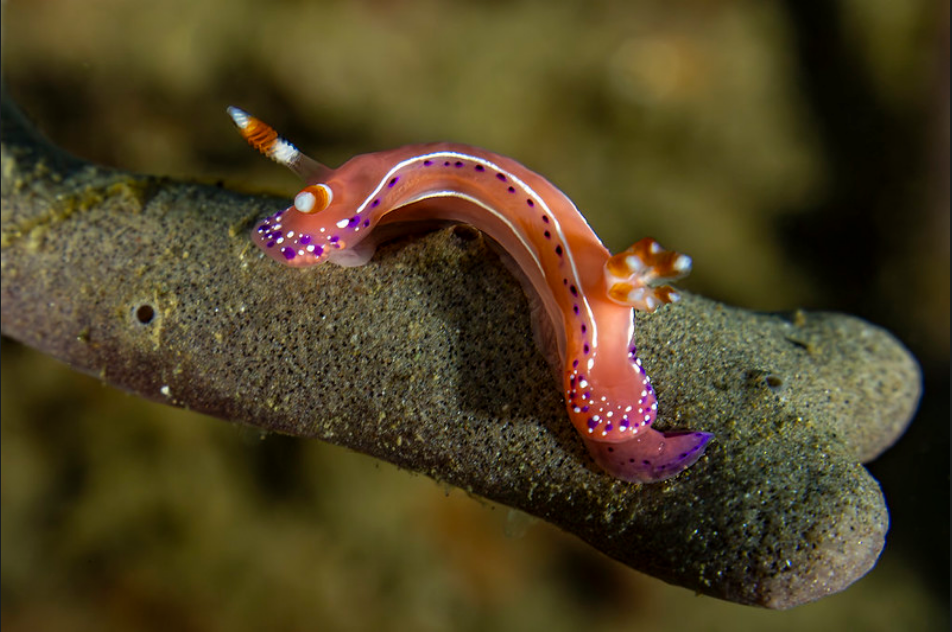
Above photo Thorunna australis, by elebe.foto
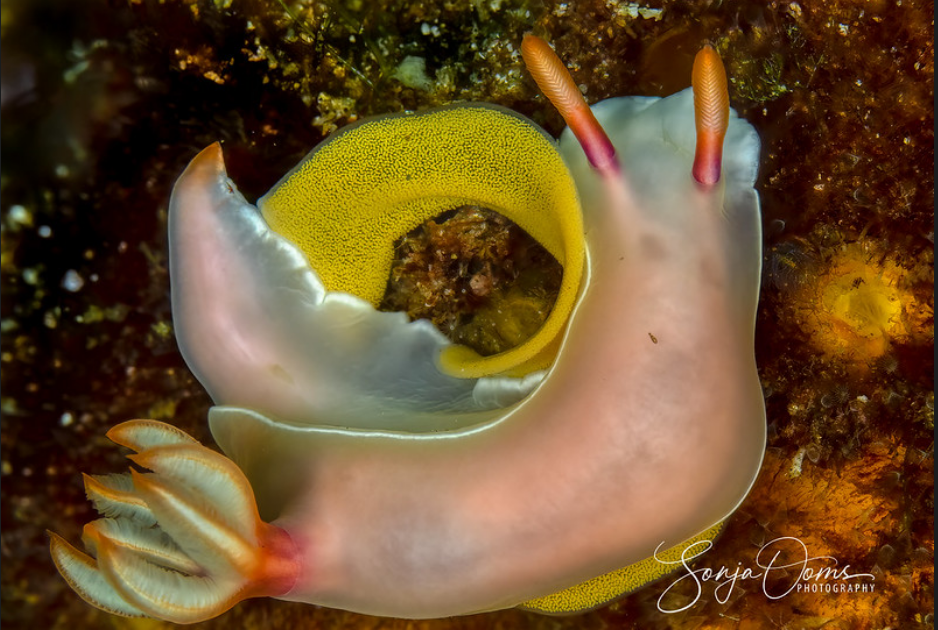
Above photo Hypselodoris bullockii laying eggs by Sonja Ooms
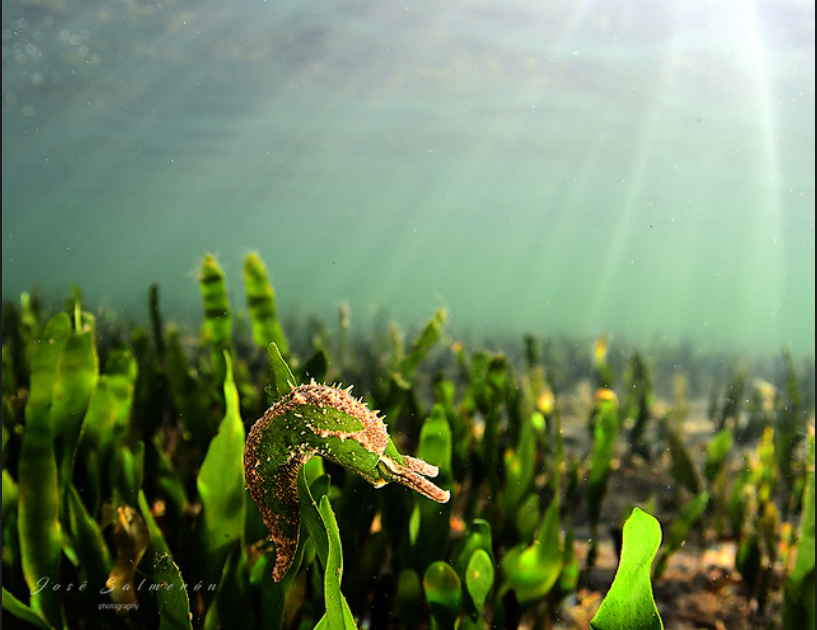
Above photo of Oxynoe olivacea by Jose Salmerón
Beautiful photo that pops with contasting colours of Elysia marginata by elebe.foto
And also lets not forget the role of the computer in adding the final touches to a well composed and well lit photograph
Some photos may need a bit of work to either remove debris in the foreground or background that distract from the main focus point…
Others need work in making them pop more. Of course images can suffer through too much retouching, and also no amount of photoshop can save a poorly composed image…both sides of the debate are discussed here
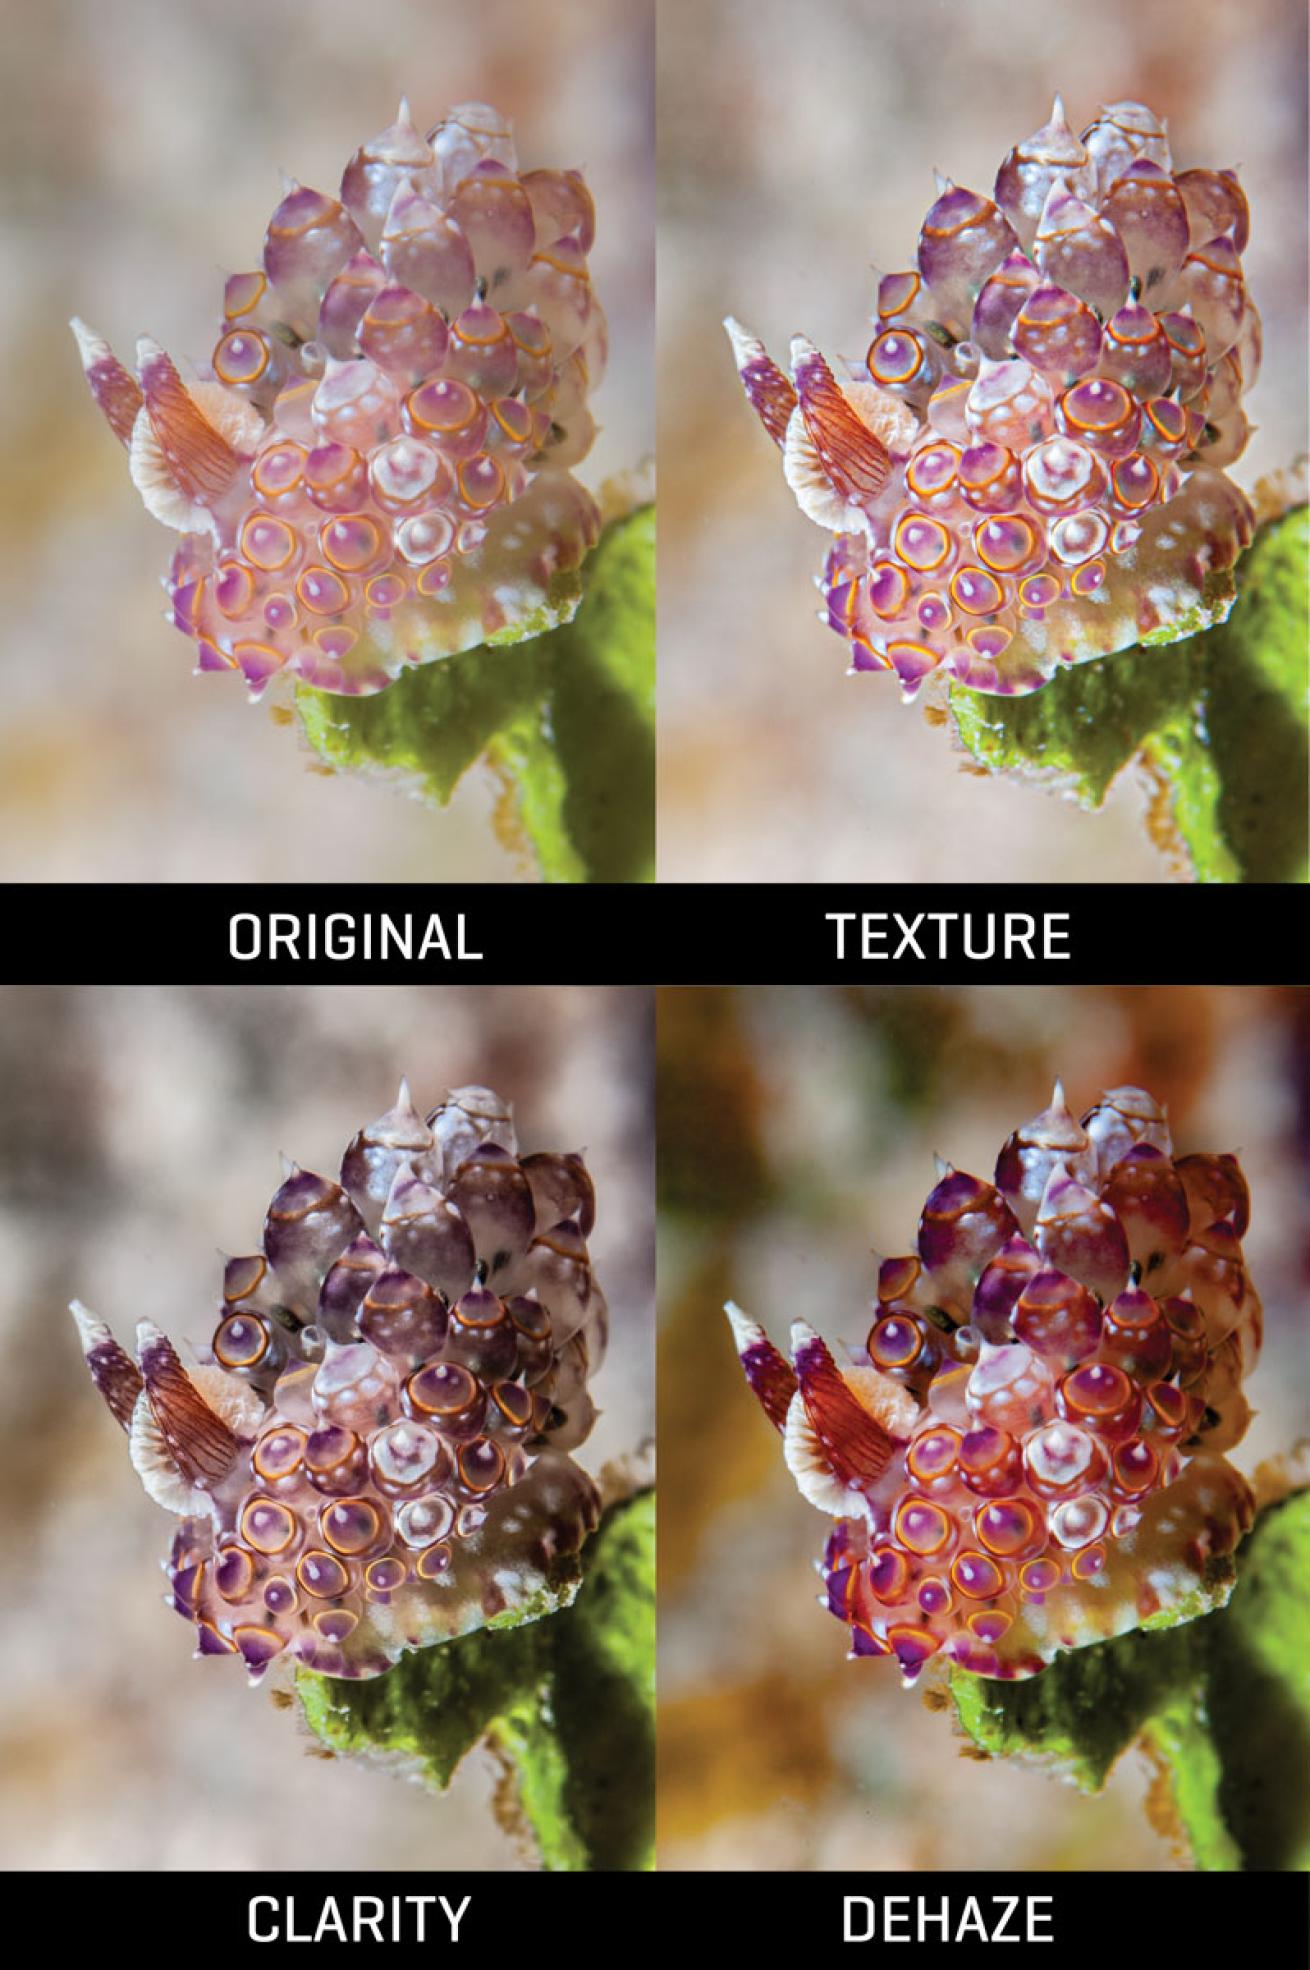
Above, ‘Here’s how to make Texture, Clarity and Dehaze work for you.’ photo by Erin Quigley
And finally a Super Pro photo by David Hall, below
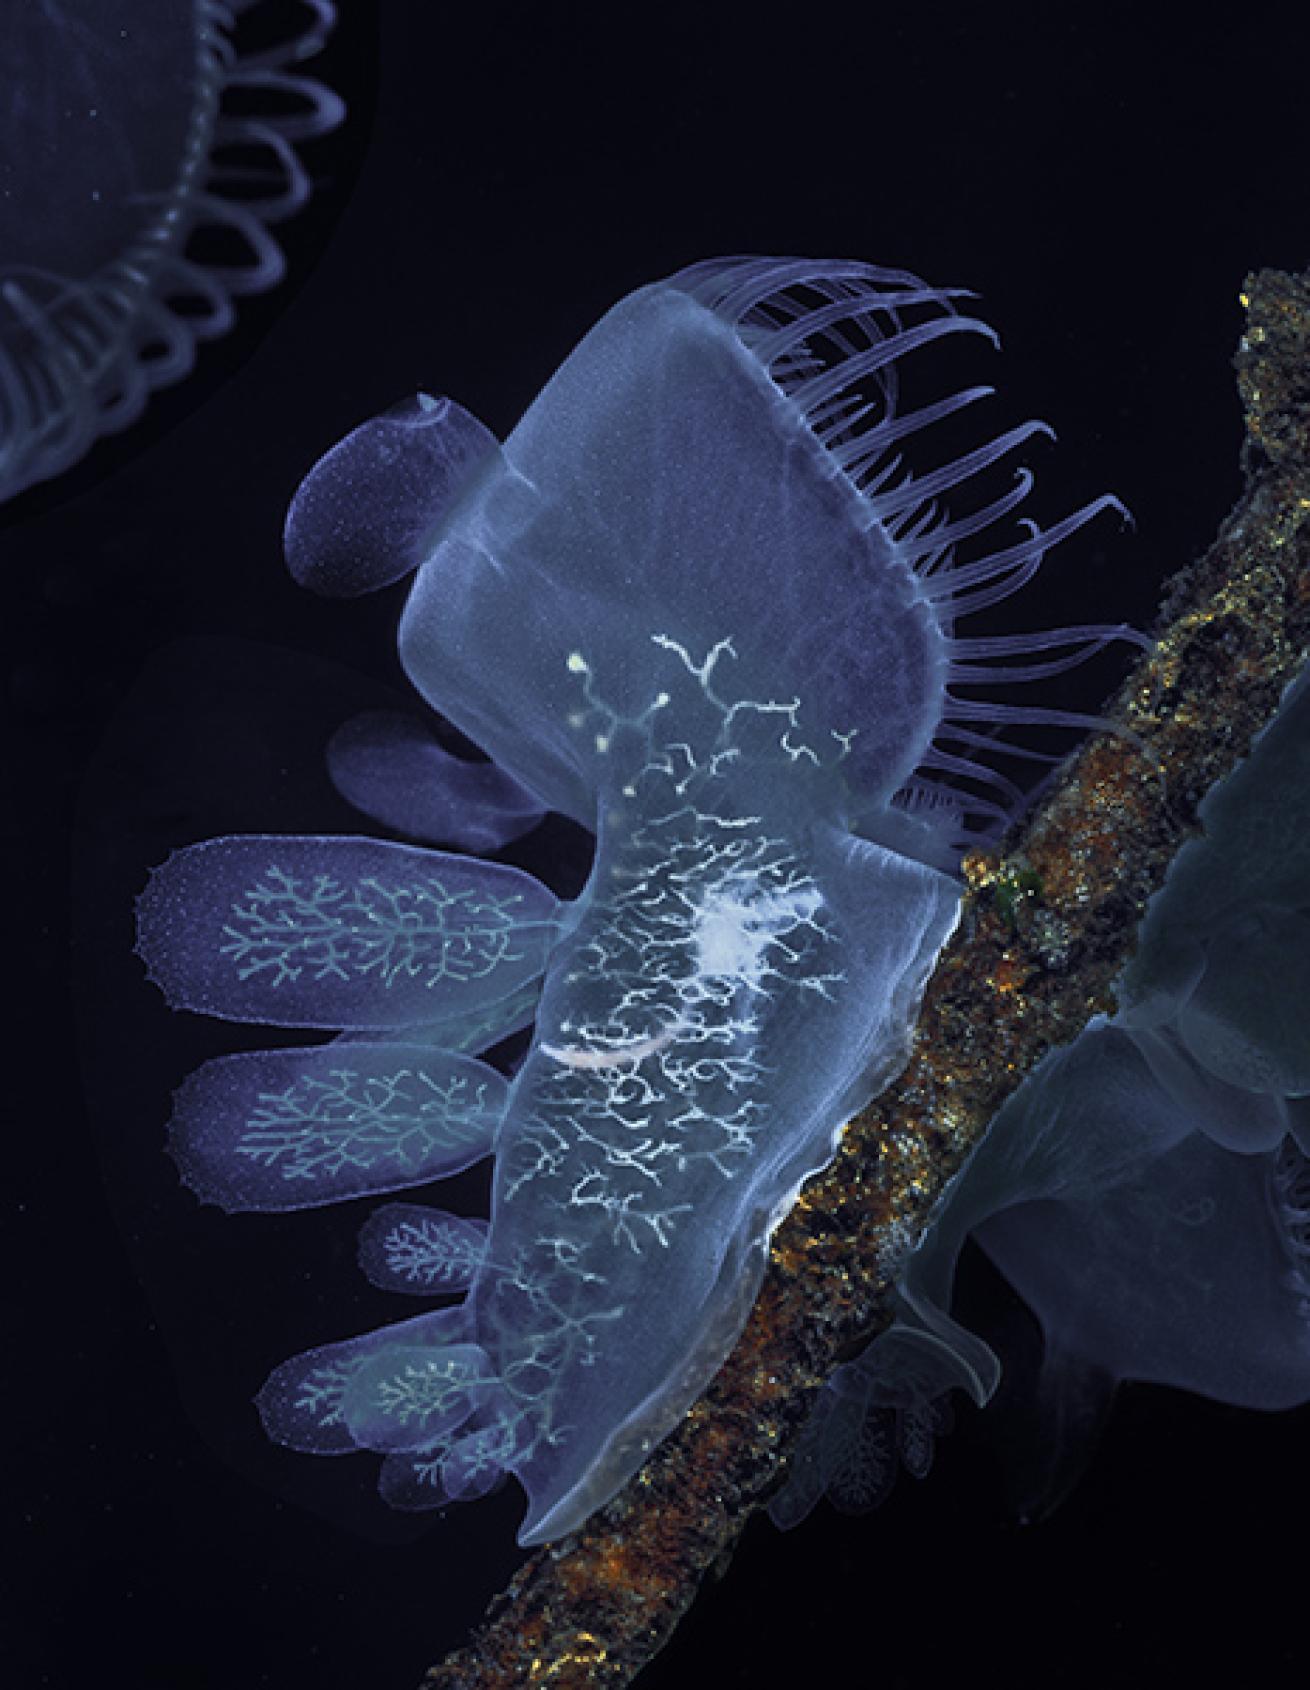
"Imagine a bull kelp forest in which the plants are completely covered with ghostlike animals expanding and contracting rhythmically,” photographer David Hall writes of shooting the hooded nudibranch, Melibe leonine, for his award-winning book Beneath Cold Seas: The Underwater Wilderness of the Pacific Northwest.
HOW HE GOT THE SHOT Hall used a Nikonos RS camera with a 50mm lens, two Ikelite SS-50 strobes and Fujichrome Velvia 50 film. Hooded nudibranchs are transparent, like jellyfish, and correct exposure can be difficult to estimate, so Hall bracketed the exposure generously. here
All information from here and here, unless otherwise stated
As always I’m not an expert, and certainly not one in underwater photography (I’m still trying to get to grips with terrestrial photography)